DIY Bookcase and Accent Wall Project: Transforming a Catch-All Room into a Stylish Office
Introduction
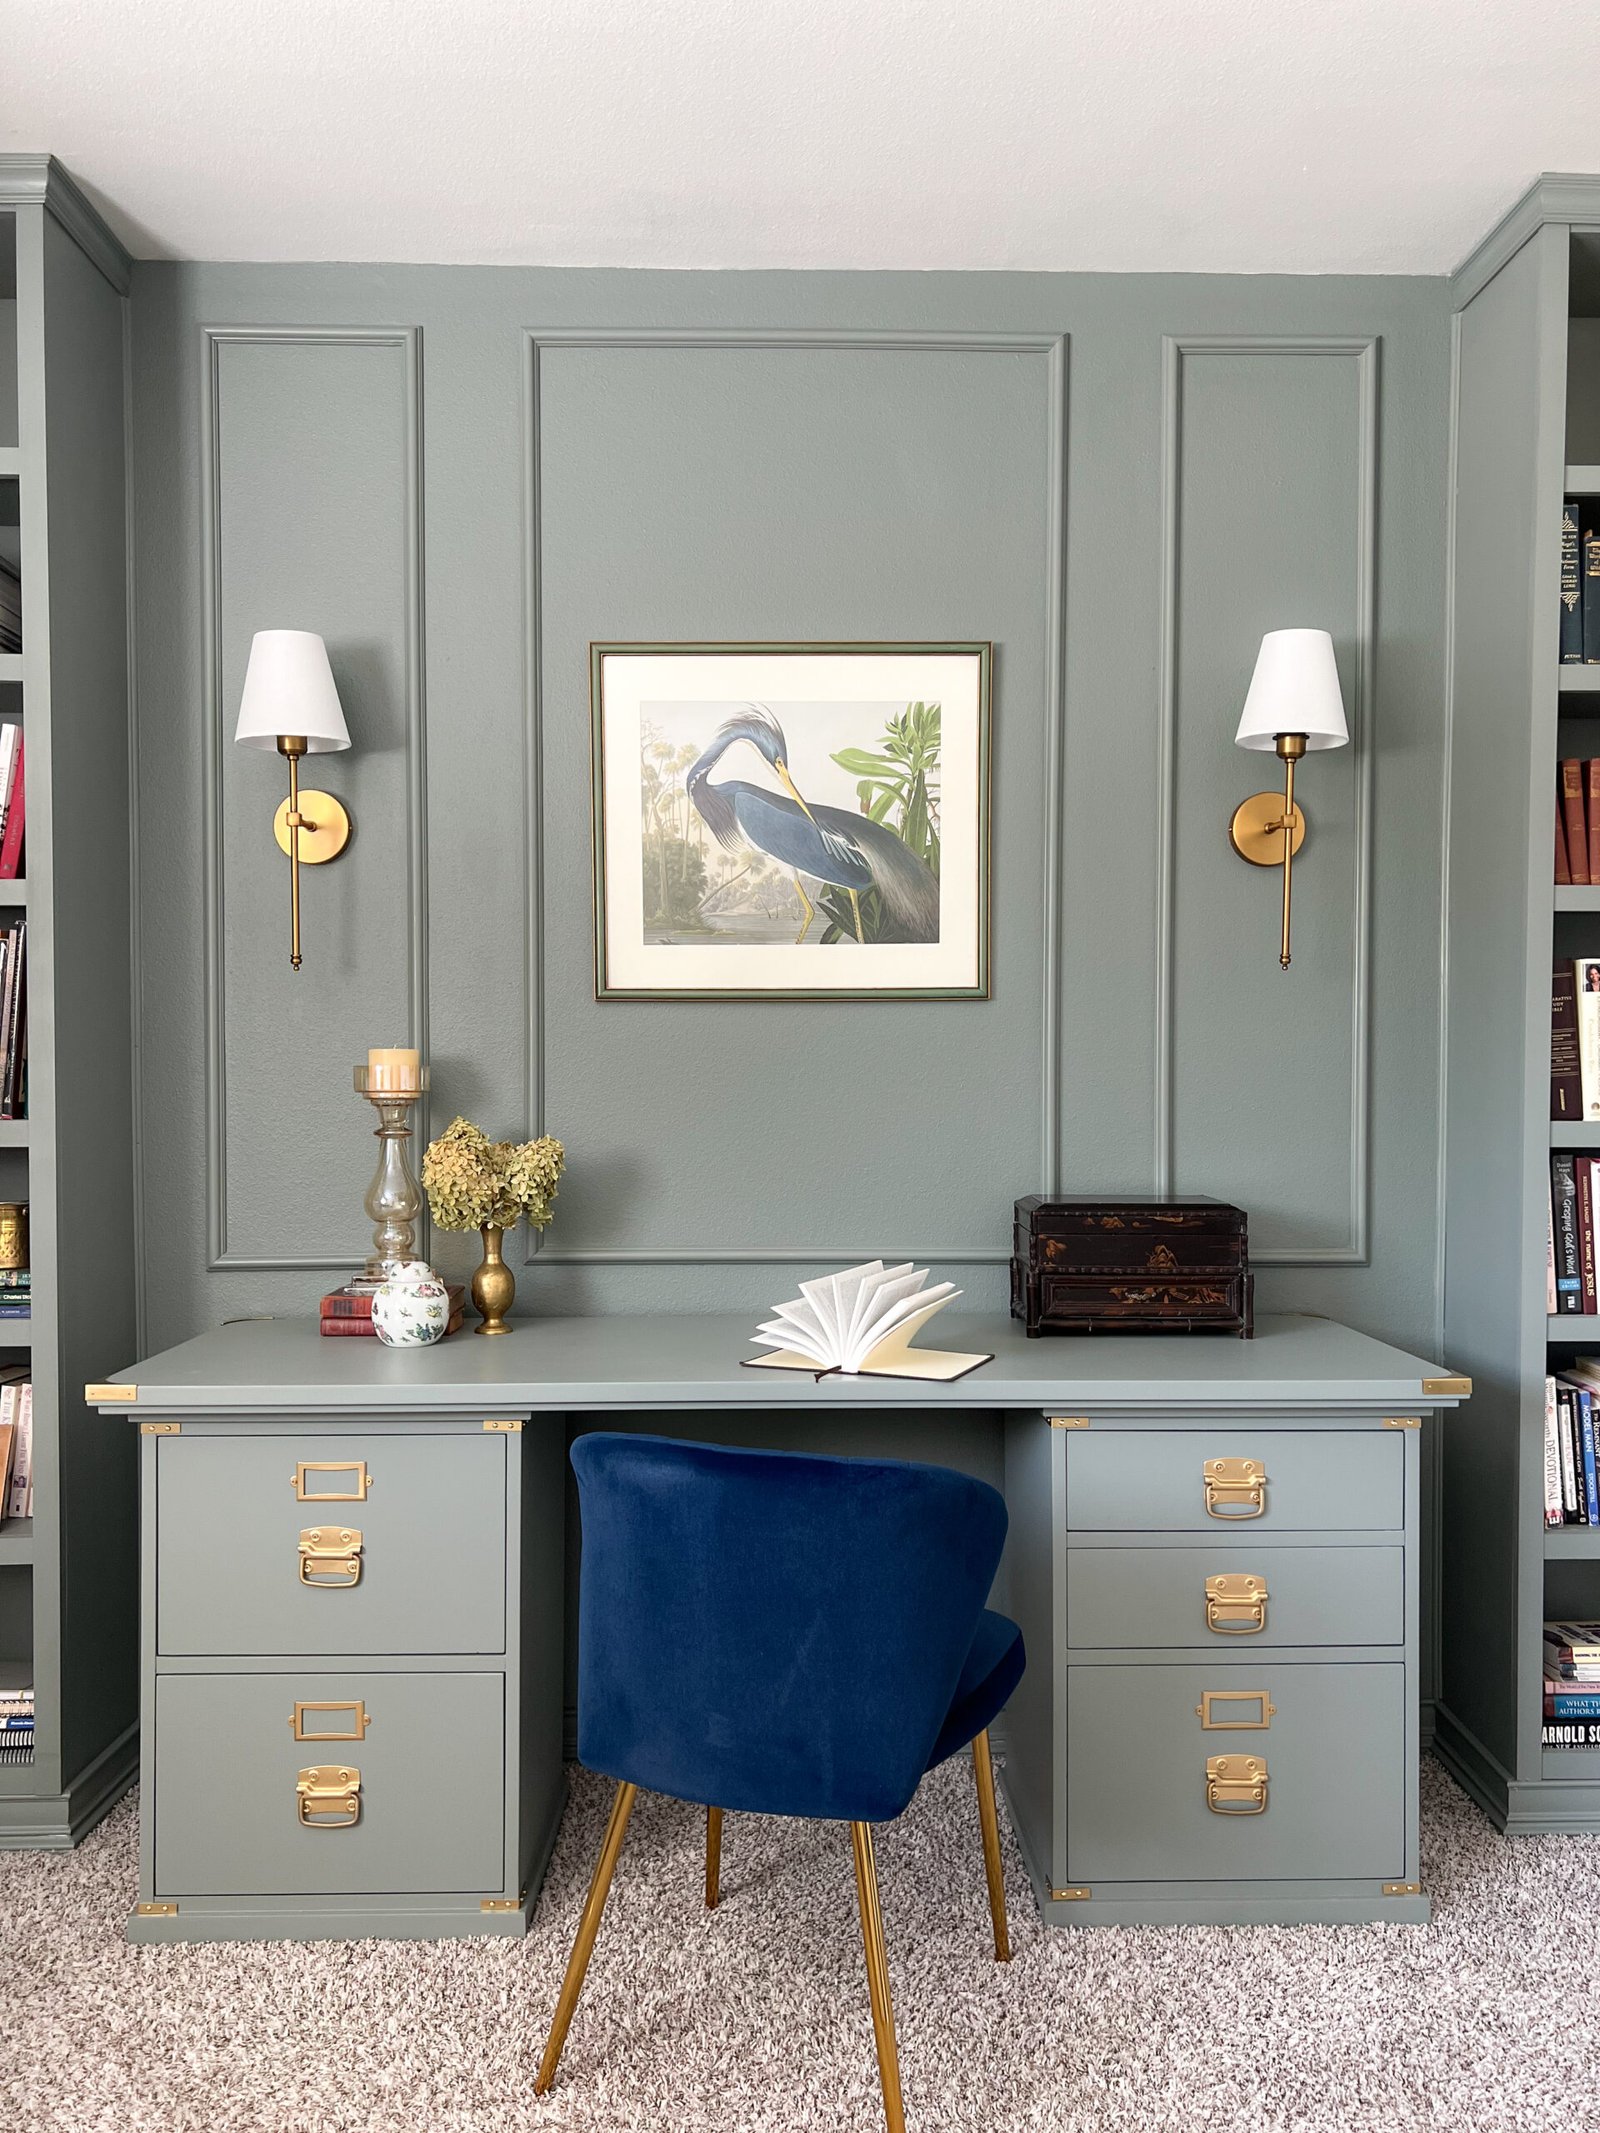
Today, I’m excited to share my journey of building bookcases and creating an accent wall to transform a cluttered upstairs room into a stylish office or studio space. Let me walk you through the process, from refurbishing an old desk to installing custom bookcases and adding elegant finishing touches.
Desk Painting Process
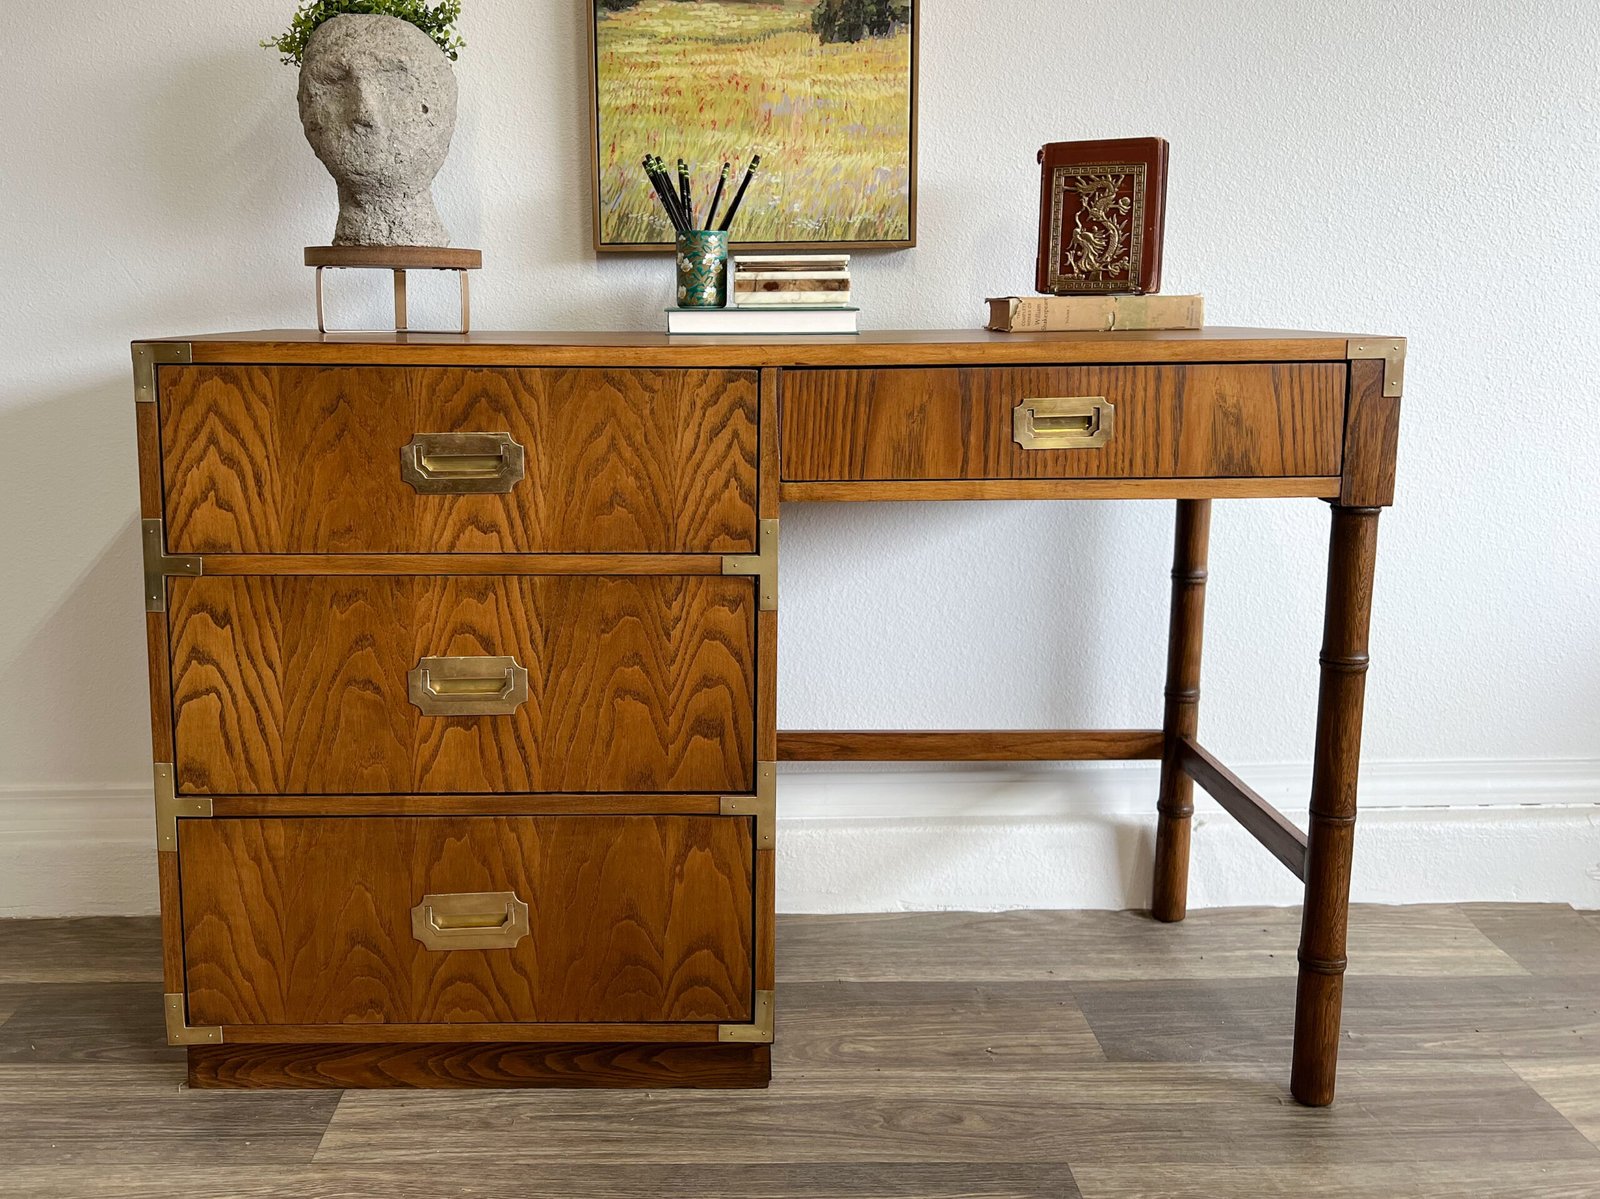
I started with an old Pottery Barn Bedford desk that I’ve had for years. Here’s how I gave it new life:
- Sanded the surface thoroughly
- Used wood filler to smooth out imperfections
- Primed with BIN shellac primer
- Applied glazing Bondo for extra smoothness
- Added a second coat of primer
- Painted with Benjamin Moore’s Command paint
- Spray painted hardware and added campaign-style accents
The result? A beautifully refreshed desk that set the tone for the entire room makeover.
Bookcase Painting Tutorial
Next, I tackled our decade-old Billy bookcases from IKEA. Here’s the process I followed:
- Scuff sanded the laminate surface
- Cleaned with liquid sandpaper
- Primed with BIN shellac primer
- Sanded between coats
- Painted with the Earlex 5700 sprayer
The color I chose is “Intrigue” by Benjamin Moore – a beautiful, moody green that perfectly complements the desk.
Design Concepts & Planning
With the painted pieces ready, it was time to plan the layout. I wanted:
- Molding in the middle
- Wall sconces
- A built-in look
- Flexibility for future use (potential guest room or den)
I decided to leave about 80 inches between the bookcases to accommodate a standard three-seat sofa if needed in the future.
Baseboard Removal Guide
Removing baseboards was a new experience for me. Here’s what I did:
- Scored along the top with a straight edge
- Used a putty knife to start lifting
- Employed a crowbar for stubborn areas
It was challenging due to long nails, but persistence paid off!
Bookcase Placement Strategy
I pushed the bookcases against the side walls, removing baseboards as needed. This placement strategy allows for future flexibility in the room’s layout.
Material Selection & Preparation
I partnered with Lowe’s for this project. Here’s what I picked up:
- BIN shellac primer
- 1×2 poplar boards for shelf fronts
- Additional boards to cover seams
I followed the same process of sanding, priming, and painting for all new wood pieces.
Cutting Board Techniques
Without a table saw, I had to get creative:
- Used a circular saw for larger cuts
- Invested in a miter saw, cordless brad nailer, and multi-tool
- Took it slow and compensated with trim and caulk
Priming & Painting Boards
For efficiency, I used spray can BIN shellac primer on the new boards. After priming:
- Scuff sanded between coats
- Used Command paint with added Floetrol
- Applied paint with a sprayer for a smooth finish
Wall Mounting Instructions
To secure the bookcases:
- Located studs and marked them clearly
- Cut baseboards to accommodate bookcase depth
- Used a multi-tool to make precise cuts in existing baseboards
Side Panel & Front Assembly
I attached side panels to cover seams and added 1×2 poplar boards to each shelf front for a more substantial look.
Molding Installation & Finishing
This was a learning experience:
- Used a multi-tool to cut curves in baseboards
- Filled gaps with wood filler and caulk
- Added small molding to cover seams
- Filled nail holes meticulously
Picture Frame Molding Tutorial
I encountered some challenges with picture frame molding, realizing the importance of considering the thick and thin sides when cutting. It was a valuable learning experience!
Wall Painting & Touch-ups
After all the woodwork:
- Painted the wall in the same color as the bookcases
- Cut in edges first, then rolled
- Applied touch-ups as needed
Batten Construction Guide
I discovered Build-a-Batten at Lowe’s – a game-changer for creating wall accents:
- Scuff sanded and primed the plastic pieces
- Snapped them together easily
- Attached with brad nails
- Caulked and touched up paint
Colored Caulk Application
I tried a new product called Exact Color:
- Tinted the caulk with wall paint
- Added a hardener
- Applied carefully (though messily at first!)
- Touched up as needed
Wall Sconce Installation
For added ambiance, I installed battery-powered wall sconces:
- Chose brass sconces with nice shades
- Used a laser level for precise placement
- Installed mounting plates
- Added rechargeable LED bulbs
Final Painting & Curtain Rod Mounting
To complete the room:
- Painted remaining walls in Benjamin Moore’s White Dove
- Mounted curtain rods close to the ceiling
- Added linen draperies for softness
Final Reveal
The transformation is remarkable! The once cluttered catch-all room is now a sophisticated, library-like office space. The dark accent wall, built-in looking bookcases, and elegant touches like the wall sconces and curtains create a cohesive, high-end feel.
Key Takeaways:
- Build-a-Batten is an excellent solution for easy wall accents
- Adding trim to IKEA bookcases can create a custom, built-in look
- Inset wall sconces add a luxurious touch
- Proper planning allows for future flexibility in room use
I’m thrilled with the results and looking forward to adding a few more pieces to complete the space. Have you tackled a similar project? Let me know in the comments!


0 Comments